This document takes you through the basics of creating reusable components and assembling them into a web application. Each component consists of a Java class and an HTML file. The framework that allows you to develop your application in this way is called Wicket. In addition to its component-based approach, a distinguishing feature of Wicket is the absence of XML configuration files. Instead of an XML configuration file, you use a Java class for application-wide settings, such as the identification of a home page.
Each widget in your web application is created in a Java class and rendered in an HTML page. The Java class and HTML page must have the same name and exist in the same source structure. They are linked to each other via a Wicket identifier. You will be shown how the IDE supports the development of component based applications so that you can quickly and efficiently create reusable components that can give your web application a consistent look and feel without very much work on your part.
Contents
Notes:
 In the next section, we will explore each of these files in detail.
Each widget in your web application is created in a Java class and rendered in an HTML page. The Java class and HTML page must have the same name and exist in the same source structure. They are linked to each other via a Wicket identifier. You will be shown how the IDE supports the development of component based applications so that you can quickly and efficiently create reusable components that can give your web application a consistent look and feel without very much work on your part.
Contents
- Setting Up the Environment
- Adding a Widget
- Adding a Reusable Component
- Adding AJAX Features
- See Also
| Software or Resource | Version Required |
|---|---|
| NetBeans IDE | Web and Java EE installation version 7.1 |
| Java Development Kit (JDK) | version 6 or above |
| Wicket plugin for NetBeans IDE | current version |
| GlassFish Server Open Source Edition or Tomcat servlet container |
2.1 or above version 6.x |
- The Wicket support plugin for NetBeans consists of the following modules:
- org-netbeans-modules-web-wicket.nbm. Provides the Wicket-specific functionality that is used in this tutorial.
- org-netbeans-modules-wicket-templates.nbm. Provides Wicket file-level templates for creating typical Wicket artifacts, such as pages and panels.
- org-netbeans-modules-wicket-library.nbm. Provides the Wicket JARs, installs them in the IDE's Library Manager. Therefore, you do not need to download the Wicket distribution from the Wicket site, because the plugin provides everything you need.
- To install the Wicket support plugin into the IDE, go to the Plugin Manager (Tools > Plugins from the main menu) and install the plugin under the Downloaded tab. For more detailed instructions on how to install a framework plugin into the IDE, see: Adding Support For A Web Framework.
- For more information on Wicket, see http://wicket.sourceforge.net/. For the development page for support for Wicket in NetBeans IDE, see http://nbwicketsupport.dev.java.net/. If you are familiar with Wicket, you are welcome to contribute code to the Wicket plugin for NetBeans IDE.
Setting Up the Environment
Before you start writing your component based application, you have to make sure you have all of the necessary software and that your project is set up correctly. Once you have installed the Wicket support plugin for NetBeans IDE as described above, you will have a wizard that sets up all the basic files needed for a Wicket application.Creating the Source Structure of a Component Based Application
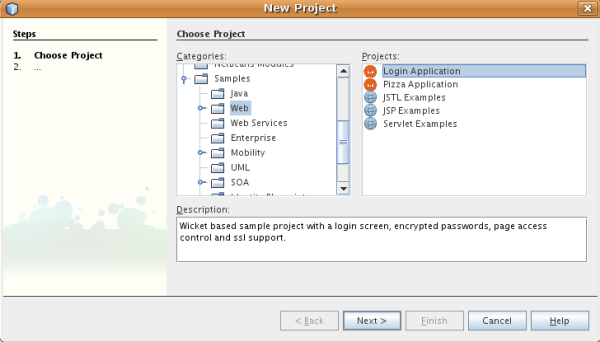
The source structure of our application must include the Wicket JAR files, the registration of the Wicket servlet in the web.xml file, as well as some standard artifacts such as the application class and a home page. Since we are using an IDE, we shouldn't need to create all these files by hand. Instead, we have a wizard to do the work for us. Specifically, the final panel of the Web Application wizard will be very useful in the context of our component based application.- Choose File > New Project. Under Categories, select Web. Under Projects, select Web Application. Click Next.
- In the Name and Location panel, type MyFirstWicketApp in Project Name. Change the Project Location to any directory on your computer. Click Next.
- Leave all the settings unchanged. Or, if you like, you can change them. Wicket supports any version of Java EE. A Wicket application can be deployed to any server. Click Next.
-
In the Frameworks panel, choose Wicket, as shown here:
 Note: Depending on the modules installed into the IDE, you may see more or less items in the Frameworks list shown in the screenshot above.In the panel shown above, leave all the defaults unchanged. The fields in the panel above provide the following:
- Wicket Filter Name. Shows the name of the filter that will be defined in the web.xml file.
- Wicket URL Pattern. Adds the relative URL pattern to the web.xml file.
- Wicket Application Class. Specifies name of the class where the application-wide settings, such as the home page, are set.
- Wicket Home Page. Specifies the name of the home page, which will consist of a file called xxx.java and xxx.html.
- Main Package. The Java package in which all the generated artifacts will be put by the IDE.
- Version. The Wicket version. Any library in the Library Manager with a name starting with "Wicket" will be listed in the Version drop-down above. By default, the only version listed is 1.5.3 because that is the version provided by the plugin.
- Click Finish.
Examining the Source Structure of a Component Based Application
The IDE's Web Application wizard created a lot of files for us. Here, we look at the files and see how they relate to each other within the context of a Wicket development.- Let's begin by looking in the web.xml file, which is the general deployment descriptor common to all web applications that comply with the Servlet specification. Expand the WEB-INF folder or the Configuration Files folder, open the file in raw XML view, and notice the definition of the Wicket filter:
<filter>
    <filter-name>WicketApplication</filter-name>
    <filter-class>org.apache.wicket.protocol.http.WicketFilter</filter-class>
    <init-param>
        <param-name>applicationClassName</param-name>
        <param-value>com.myapp.wicket.Application</param-value>
    </init-param>
    <init-param>
        <param-name>debug</param-name>
        <param-value>2</param-value>
    </init-param>
</filter>
<filter-mapping>
    <filter-name>WicketApplication</filter-name>
    <url-pattern>/wicket/*</url-pattern>
</filter-mapping>
Notice the value of the application class name. In the next step, we will open the application class file and inspect its content.
- Open the com.myapp.wicket package in the Source Packages folder and then open the Application.java file. It looks like this:
package com.myapp.wicket;

import org.apache.wicket.protocol.http.WebApplication;

public class Application extends WebApplication {

    public Application() {
    }

    public Class getHomePage() {
        return HomePage.class;
    }

}
This is the Java file that provides application-wide settings, comparable to struts-config.xml in the Struts framework and faces-config.xml in the JSF framework. Notice the definition of the getHomePage() method. This method is the minimum requirement of the application-wide class. It specifies the first page (the home page) that will be displayed when you deploy the application. Notice that HomePage.class is returned. In the next step, we will open the HomePage.java file and inspect its content.
- Open HomePage.java. It looks like this:
package com.myapp.wicket;

public class HomePage extends BasePage {

    public HomePage() {

    }

}
The file is empty. Rendering of Wicket widgets created in this file is done in a file with the same name in the same source structure, which can only be HomePage.html, which looks as follows, currently:
<!DOCTYPE HTML PUBLIC "-//W3C//DTD HTML 4.01 Transitional//EN">

<html>
  <head>
    <title></title>
    <link wicket:id='stylesheet'/>
  </head>
  <body>
    <span wicket:id='mainNavigation'/>

  </body>
</html>
Notice that in HomePage.java we are extending BasePage. In HomePage.html we have a wicket:id attribute, which tells us that this is a placeholder for something created somewhere by a Java file. Also, we have a reference to the CSS stylesheet that the IDE generated for us. You can find it in the Web Pages folder, in the Projects window. In the next step, we will open BasePage and examine its content.
- Open BasePage.java. This is what it looks like:
package com.myapp.wicket;

import org.apache.wicket.markup.html.WebPage;
import org.apache.wicket.model.IModel;
import org.apache.wicket.markup.html.resources.StyleSheetReference;
import org.apache.wicket.util.string.Strings;

public class BasePage extends WebPage {

    public BasePage() {
        this(null);
    }

    public BasePage(IModel model) {
        super(model);
        final String packageName = getClass().getPackage().getName();
        add(new HeaderPanel("mainNavigation", Strings.afterLast(packageName, '.')));
        add(new StyleSheetReference("stylesheet", BasePage.class, "style.css"));
    }

}
This is the class that we want all our web pages to extend. For example, notice the line in bold above. Every class extending BasePage will inherit an instance of HeaderPanel. The Wicket id is "mainNavigation", which is the Wicket id we saw in the previous step, in the HomePage.html file. We can refer to the "mainNavigation" Wicket id at the top of all our HTML pages. This ensures that all our web pages will have the same header. In the next step, we will open HeaderPanel.java and inspect its content.
- Open HeaderPanel.java. This is what it looks like:
package com.myapp.wicket;

import org.apache.wicket.markup.html.basic.Label;
import org.apache.wicket.markup.html.panel.Panel;

public class HeaderPanel extends Panel {

    public HeaderPanel(String componentName, String exampleTitle)
    {
        super(componentName);
        add(new Label("exampleTitle", exampleTitle));
    }

}
Notice the line in bold above. Here, we create a Wicket Label widget. The HeaderPanel is a reusable component. This is the Java side, where widgets are created. Next we will look at the HTML side, which is where we can expect the Wicket Label widget to be rendered. In the next step, we will open the HeaderPanel.html file and inspect its content.
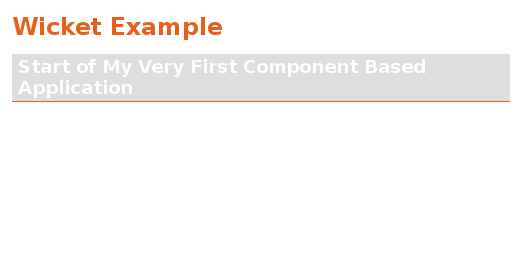
Now change the second argument to "My Very First Component Based Application", so that the definition of the Label is now as follows:
add(new Label("exampleTitle", "My Very First Component Based Application")); - Open HeaderPanel.html. Notice that it has the same name as the Java file we have just looked at. It is found within the same package structure. This is what it looks like:
<html xmlns:wicket>
 <body>
  <wicket:panel>
    <h1>Wicket Example</h1>
    <p id="titleblock">
        <b><font size="+1">Start of
        <span wicket:id="exampleTitle">Example Title Goes Here</span></font></b>
    </p>
  </wicket:panel>
 </body>
</html>
Notice the line in bold above. This is how you specify where a widget should be rendered in the HTML side of a web page. Hold down the Ctrl key and move your mouse over the value of the wicket:id attribute in the span tag. Notice that the value turns into a hyperlink:
Click the hyperlink and notice that the Java side of the web page opens.
Now click the left arrow at the top of the Source Editor to return to the HTML page:
In this way, you can navigate quickly and efficiently between the two sides of Wicket components.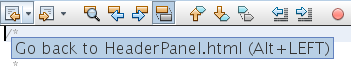
- Right-click the project and run it. The IDE compiles the application, creates a WAR file, sends it to the deployment server, opens the IDE's default browser, and displays the application:
Adding a Widget
In this section, we create our first widget in Wicket. Just like most other artifacts in Wicket, a widget has a Java side and an HTML side. On the Java side, the widget is created. On the HTML side, it is rendered. As shown previously, navigation between the two sides is made possible via a hyperlink.- Open HomePage.html and add the tag in bold below:
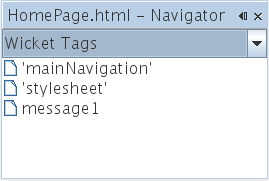
<!DOCTYPE HTML PUBLIC "-//W3C//DTD HTML 4.01 Transitional//EN">

<html>
  <head>
    <title></title>
    <link wicket:id='stylesheet'/>
  </head>
  <body>
    <span wicket:id='mainNavigation'/>
    <span wicket:id="message1">this text will be replaced</span>

  </body>
</html>
Open the Navigator (Window > Navigating > Navigator), while the above HTML file is selected in the editor, and then you can see an overview of the tags, in the Navigator's "Wicket Tags" list:
- Open HomePage.java and add a label, with the same identifier as in the HTML file (changes in bold):
public HomePage() {

    setModel(new CompoundPropertyModel(this));
    add(new Label("message1","Hello world!"));

}
You need to import Wicket's implementation of Label. To do so, click the lightbulb icon located to the left of the line in which Label appears. Select the import org.apache.wicket.markup.html.basic.Label option from the list and note that the import statement is added to the top of HomePage.java:

- Right-click the project and choose Run Project. When the application is deployed again, you will see the Wicket Label, rendered in the HomePage.html file:

- Add H2 tags around the SPAN tag in the HomePage.html file and deploy the application again. Notice the result:

Note: You can create placeholders, just like the SPAN tag you created in the HomePage.html file, and then hand the HTML file to your web designer. While the web designer designs the web page, you can work on the Java side and create the widgets completely independently. Since the HTML tags are not embedded in the Java file, you and the web designer can reap the rewards of Wicket's central focus of "separation of concerns".
Adding a Reusable Component
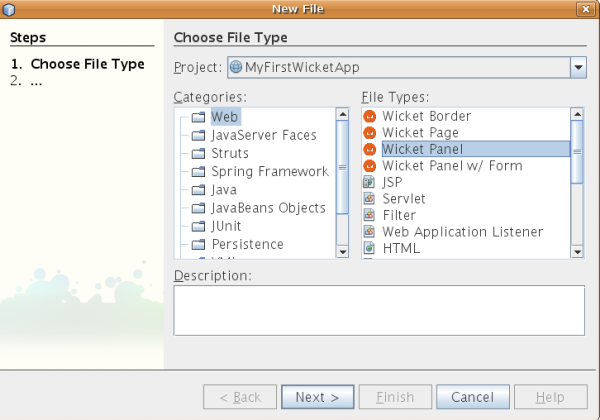
One of strengths of Wicket is the concept of "reusable components". Here, in this section, we use a wizard to generate a panel, which again has a Java side and an HTML side. We will create this panel so that we have a footer that we will reuse in our web pages, so that the footer is consistent across our web site. We will see how easy it is to add a panel to a web page.- Right-click the com.myapp.wicket package node and choose New > Other. Under Categories, choose Web. Under File Types, notice the following templates:
Note: At the time of writing, the BodyBorder template does not work.
Choose Wicket Panel and click Next.
- Type FooterPanel in File Name. You should now see the following:
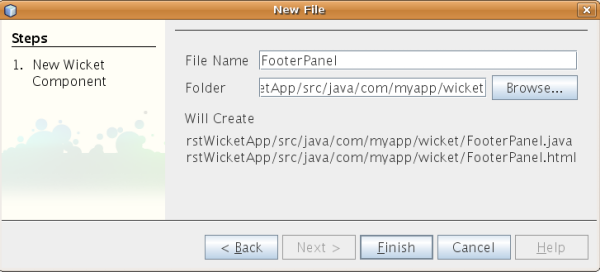
Click Finish.
Notice that we now have two new files in our package, FooterPanel.html and FooterPanel.java.
- Open FooterPanel.html and notice that the content of the file is as follows:
<?xml version="1.0" encoding="UTF-8"?>
<!DOCTYPE html PUBLIC "-//W3C//DTD XHTML 1.0 Strict//EN" "http://www.w3.org/TR/xhtml1/DTD/xhtml1-strict.dtd">
<html xmlns:wicket>
    <head>
        <meta http-equiv="Content-Type" content="text/html; charset=UTF-8"/>
        <title>FooterPanel</title>
    </head>
    <body>
        <wicket:panel>
            <!-- TODO - add components here, ala

            <span wicket:id="title">title here</span>

            -->
        </wicket:panel>
    </body>
</html
Between wicket:panel tags, a Wicket placeholder is found. Remove the line above and below the SPAN tag, so that the line with the SPAN tag is no longer commented out. Hold down the Ctrl key, move the mouse over the value of the Wicket id, and click the hyperlink that appears. The FooterPanel.java file opens:
package com.myapp.wicket;
import org.apache.wicket.markup.html.panel.Panel;

final class FooterPanel extends Panel {
    FooterPanel(String id) {
        super (id);
    }
}
Add a label, as you did earlier in the HomePage.java file, shown in bold below:
package com.myapp.wicket; import org.apache.wicket.markup.html.basic.Label; import org.apache.wicket.markup.html.panel.Panel; final class FooterPanel extends Panel { FooterPanel(String id) { super (id); add(new Label("title","I am a reusable component!")); } } - Our panel, while simple, is actually complete already. Lets add it to the home page. Open HomePage.java and then create a new instance of FooterPanel, by adding the following line to the end of the Constructor:
add(new FooterPanel("footerPanel")); - Next, we need to render the panel. Open HomePage.html and add the placeholder tag right above the closing BODY tag, making sure to use the same Wicket identifier as used in the Java file:
<span wicket:id='footerPanel'/>
- Run the project again. Notice that the panel is displayed, exactly where the HTML file specified it should be rendered:
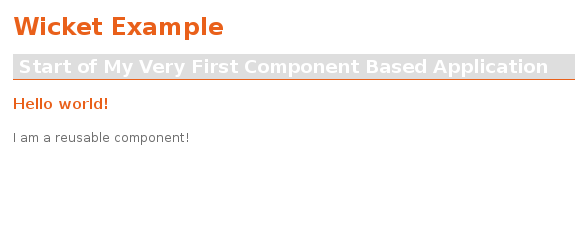
Note: In Wicket terminology, a panel is a reusable component. Exactly as shown in this section, you can reuse the panel as often as you like and in as many web pages as you fancy.
Adding AJAX Features
Instead of using JavaScript to add AJAX features to a Wicket application, Wicket makes available a Java component model that encapsulates AJAX features. Below, you are shown how to change the FooterPanel to include an AJAX autocomplete widget, instead of the label widget you created previously.- Add a Wicket AutoCompleteTextField class, by adding the code below to the FooterPanel.java file:
final AutoCompleteTextField field = new AutoCompleteTextField("countries", new Model("")) { @Override protected Iterator getChoices(String input) { if (Strings.isEmpty(input)) { return Collections.EMPTY_LIST.iterator(); } List choices = new ArrayList(10); Locale[] locales = Locale.getAvailableLocales(); for (int i = 0; i < locales.length; i++) { final Locale locale = locales[i]; final String country = locale.getDisplayCountry(); if (country.toUpperCase().startsWith(input.toUpperCase())) { choices.add(country); if (choices.size() == 10) { break; } } } return choices.iterator(); } }; - In the FooterPanel constructor, comment out the line that created our label and add a new line that adds the field you created above. The two changed lines are in bold below:
FooterPanel(String id) { super(id); //add(new Label("title", "I am a reusable component!")); add(field); } - Make sure the FooterPanel class uses the following import statements:
import java.util.ArrayList;
import java.util.Collections;
import java.util.Iterator;
import java.util.List;
import java.util.Locale;
import org.apache.wicket.extensions.ajax.markup.html.autocomplete.AutoCompleteTextField;
import org.apache.wicket.markup.html.basic.Label;
import org.apache.wicket.markup.html.panel.Panel;
import org.apache.wicket.model.Model;
import org.apache.wicket.util.string.Strings;
- On the HTML side of the FooterPanel class, comment out the rendering of the Wicket label. Below it, add an HTML text field that is linked to the FooterPanel class using the "countries" Wicket id, which is what you used in the implementation of the AutoCompleteTextField class:
<?xml version="1.0" encoding="UTF-8"?> <!DOCTYPE html PUBLIC "-//W3C//DTD XHTML 1.0 Strict//EN" "http://www.w3.org/TR/xhtml1/DTD/xhtml1-strict.dtd"> <html xmlns:wicket> <head> <meta http-equiv="Content-Type" content="text/html; charset=UTF-8"/> <title>FooterPanel</title> </head> <body> <wicket:panel> <!--<span wicket:id="title">title here</span>--> <input type="text" wicket:id="countries" size="50"/> </wicket:panel> </body> </html - Run the application again and you will have an AJAX autocomplete field. As you type, the field will be filled with countries matching the entered text.
Nguồn http://netbeans.org/kb/docs/web/quickstart-webapps-wicket.html


0 comments:
Post a Comment